Pages

Followers

Tuesday 30 September 2014

Vellum Port Window Card


Recipe:
  • Sherry Ann Baldy's My Besties Digital Stamp
  • Kaisercraft Cardstock
  • Bella Glitz Cardstock
  • Liquid Pearl Drops ~ Colour:  "Orchid"
  • Doily Die: Whimsy
  • Circle Die underlayers for Port Window ~ Mpress Nestling Dies
  • Vellum Clear Thick for Port Window
  • Die Corners: Spellbinders Shapeabilities S5-071
  • Die for Bow and Boarder: Sue Wilson
  • 10mm Mauve Pearls
  • Copics: E000 E21 E00 E20 R17 BV08 V12 BV00 E43 E59
Entry No. 27 ~ Crafting from the Heart ~ Anything Goes"
Finishes on: 6th October 2014
http://craftingfromtheheartchallengeblog.blogspot.com.au/2014/09/challenge-38.html 

Entry No. 14 ~ Cutie Pie Challenge # 79 ~ All Three's (I have used 3 Papers)
Finishes on 10th October 2014
http://cutiepiechallenge.blogspot.co.uk/2014/09/challenge-79-all-threes-for-cutie-pies.html 

Entry No. 5 ~ The Paper Makeup Stamps # 160 ~ Favourite Colour
Finishes on: 8th October 2014
http://papermakeupstamps.blogspot.com.au/2014/09/digi-makeover-challenge-160-favorite.html 

Entry No. 23 ~ Die Cutting Divas ~ Anything Goes
Finishes on: 7/10/14
http://diecuttindivas.blogspot.com.au/2014/09/challenge-185-anything-goes.html 

Entry No. 6 ~ Eureka Stamps # 108 ~  Use some Bling
http://eurekastamps.blogspot.com.au/2014/09/eureka-stamps-challenge-108-use-some.html

Monday 29 September 2014

"My Heart Is Yours"

"My Heart Is Yours"
Red and White Easel Heart Card


I recently discovered Gift Box Easel Cards.

I wanted to try something completely different to what other people had made so I thought up the idea of making Heart Box Easel Card. 

I have studied various techniques and styles of boxes but ended up working for two days on my own design as the heart box styles I downloaded off Google just did not suit my needs. I started off with my Cherry Lynn Hearts Dies utilizing various sizes ensuring I had a top and bottom heart, I then cut a strip and scored along the strip and cut out "V" sections to curve around the lower part of the heart. Once I had the bottom heart attached with the heart box wall I then went around the edge with the glue gun of the top heart and glued it to the box. 

I then attached Ribbon and printed paper with double sided adhesive around the box heart then rolled a heart cut shape over the box to give it extra lacy effect. I then stacked up my heart boxes and completed my Heart Box Easel Card.
The Easel itself is actually separate to the platform, this being to stabilize it with all of the weight of my heart box and Digital etc. I have layered extra Cardstock on the walls of the Easel to give it strength and support. The platform I have cut out a separate piece of cardstock and then attached the Easel with double sided adhesive to the platform then decorated my Easel.

Here also is a link for making heart shaped boxes:  Heart Shaped Boxes


Correction to this document ~ should read
"Fold your Easel into (Triangle) shape not (Diamond) shape" 


Recipe:
  • Sherri Ann Baldy's My Besties Digital Stamp IMG238 
  • Kaisercraft Cardstock
  • Hearts Embossing Folder
  • Bella Glitz Cardstock
  • Red and White Paper Mulberry Roses Ebay
  • Red and White Designer Check Paper from old stash
  • White Gel Pen
  • My Heart Is Yours from Craftworks Sticker Book of Phrases
  • Banners Dies: Spellbinders Shapeabilities S5-030 
  • Gold Gel Pen to cover the white Plastic Corners
  • 1/2" Red Satin Ribbon Spotlight
  • Heart Dies: Cheery Lynn Designs
  • Gold Quill Paper
  • Stylecraft Crystals
  • 1" White Satin Ribbon from Spotlight
  • Copics: R27 R17 E35 E15 E59YG63
Entry No. 116 ~ Imagination Crafts ~ Challenge September Anything Goes
Finishes on: 6/10/14
http://imagination-craftschallenges.blogspot.com.au/2014/09/september-challenge-anything-goes.html 

Entry No. 9 ~ Ooh La La Challenge #166 ~ Use a Bow
Finishes on: 12th October 2014
http://ooh-la-la-creationschallenges.blogspot.com.au/2014/09/challenge-166.html 

1st Prize Winner ~ (86 Entries)
Entry No. 13 ~ Love To Create Challenge # 135 ~ Ribbon
Finishes on 6th October 2014
http://lovetocreatechallenge.blogspot.com.au/2014/09/challenge-135-love-of-ribbon.html 


Entry No. 22 ~ Die Cutting Divas # 185 ~ Anything Goes
Finishes on:
http://diecuttindivas.blogspot.com.au/2014/09/challenge-185-anything-goes.html  

Entry No. ~ Glitter and Sparkle ~ Anything with a "B" ~ I have used Bows
Finishes on: 11/10/14
http://glitternsparklechallengeblog.blogspot.co.uk/2014/10/challenge-105.html 


Sunday 28 September 2014

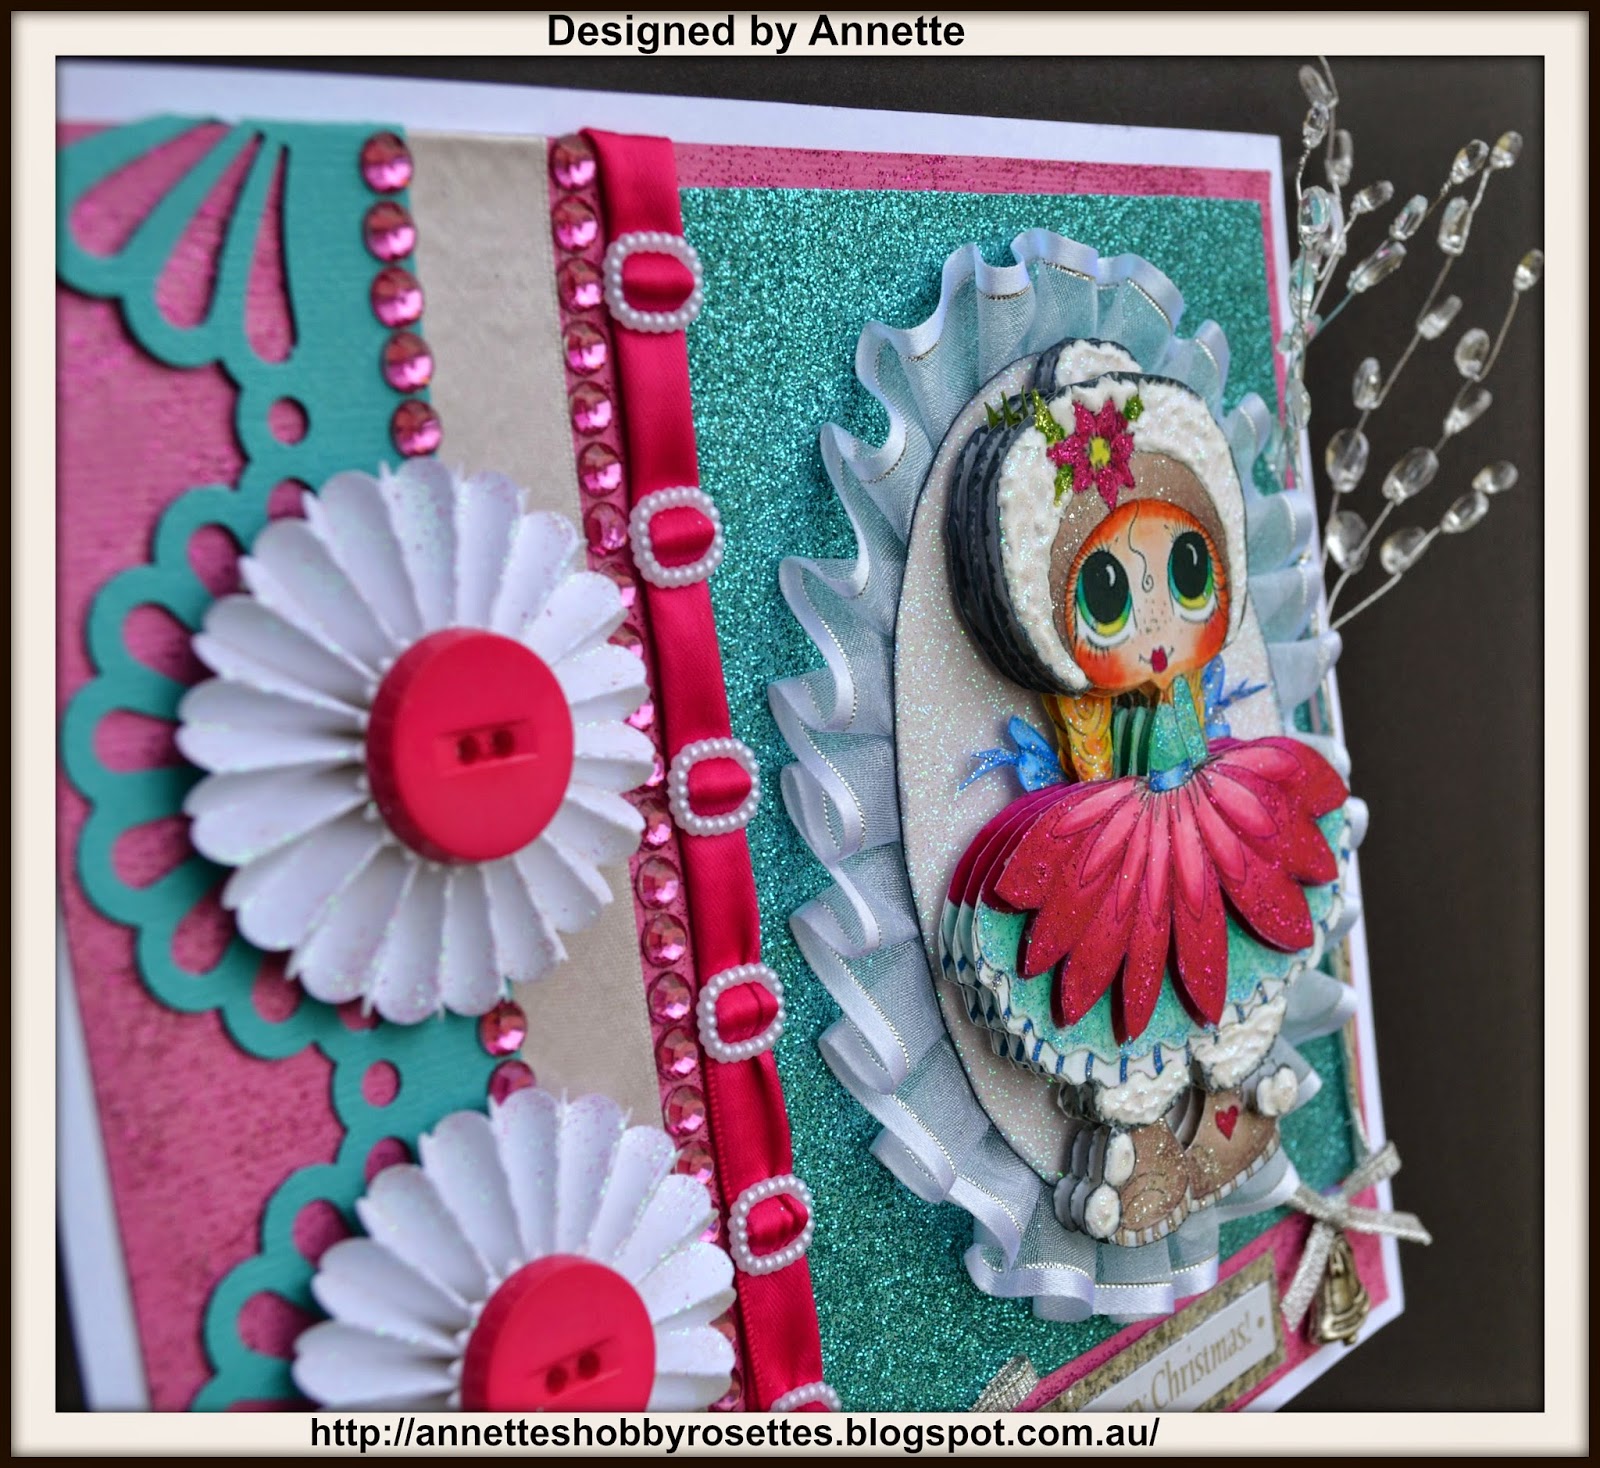
Xmas Card with Diamonds and Pearls

Xmas Card with Diamond and Pearls
Blinged Up
Recipe:
 
  • Sherri Ann Baldy's My Bestie 3D Xmas Decoupage Digi
  • True Snow with Pearl Glitter Glue overlay on Hat and Trimmings
  • Cardstock: Bella Glitz
  • Glitter Glues: Pearl ~ Aqua ~ Bright Pink
  • Crystal Rhinestones from Stylecrafts
  • Pink Rhinestones from Jolly Olly
  • Ivory Pearls from PortaCraft
  • Glitter Pearl Candy Drops from Pebbles
  • 1" White and Silver Thread Ribbon
  • 1" Bright Pink Buttons
  • Rosettes ~ White Cardstock with Pearl Glitter ~ Tim Holtz Die 5cm Rosette
  • White 1" Satin Ribbon
  • 10mm White Plastic Buckles
  • Bells and Silver Ribbon Bows
  • Martha Stewart large edger punch
  • Crystal Tree from Green Tara
  • Kaiser Cardstock
  • Copics: V05 E21 R20 B18 Y11 G82C5 
  •  
  • Entry No. 3 ~ 52 Christmas Card Throwdown ~ Diamonds & Pearls
  • Finishes on: 4th October 2014
  • http://52cct.blogspot.com.au/2014/09/september-stash-challenge.html 

Saturday 27 September 2014

Friday Cards Tutorial ~ 3D Techniques


Hello Friends !

Annette here for the Scrapbook Blessings Club to share with you Friday's project ~ "Cards" and I am using a technique for 3D on my card today and would like to share my ideas with you.

Tip of the Day: Never have any white showing on your 3D Images ~ colour with Copic Pens on edges.

Now onto my tutorial.
One of my huge favorites with making my cards is using 3D Images. They just look absolutely sensational on any creation.
Although very time consuming colouring 3 to 4 of the same image of Digital Stamps and then having to cut them out, I find buying the pre-colored 3D sheets a much better idea and huge time saver.

 First up you need a very fine sharp pointed pair of scissors

  • Once you have printed off your 3D pre-coloured sheet cut out all of the Images which are printed on the sheets in the actual layering order. 
  • To get into the enclosed areas where in this instance are boots, I cut through the join of the boot and then cut out the white section (see photo 1) ~ I find by using very fine pointed scissors rather than using a Blade I get a much more precise cut
  • With the white sections next to the body and hair, I cut along the edge of the bow and then around the hair to cut out the white section and I do this on both sides of the body as seen here in (see photo 2)
  • The 3rd photo is how it looks once I have cut out the entire Digi, you will see no white sections 
  • I repeat this with all of the other 3D Image Layers


  • Being exceptionally fussy and a perfectionist, I do not like to see any white showing around the outside of my cut out image, although very hard to avoid I counteract this with my Copic Pens to color in the edges matching the actual colour on that part of the image, ie: Bright Pink Dress I use a Bright Pink Copic on the outer edging etc
  • Nothing annoys me more than seeing a layered 3D image with White cut edges showing


  • Once I have gone around the entire edges of my 3D Images I then often re-color any faint or pale parts of the clothing, face and hair etc. with my Copics

  • When I have completed my Copic touch ups I turn over each Digi and stick down the parts where I have cut through sections with the scissors to cut out the white sections I tape these areas down so that these cut areas are not visible on the right side of the Digi ~ I repeat this with all of the 3D Digi Layers
  • My 3D's are now all ready for mounting before the next procedure ~ applying a nice thick double sided foam, I mount each section on top of one another very carefully

  • Once my 3D Digi is all mounted it is now ready to complete the last procedure
  • Since this is a Xmas Digi I often use my True Snow and loads of Glitter Glue
  • It is imperative that the True Snow is completely dried prior to applying the Glitter over the top.
  • I am going to apply the True Snow to the hat, boots and pom poms
  • I always use a Pearl Glitter Glue over the top of the True Snow for a bling effect 
  • Using two sized paint brushes both for the True Snow as well as the Glitter Glue (Fine and Medium) I apply the Glitter Glue over the True Snow
  • I then apply matching colored Glitter Glues to the clothing, flowers, headband and boots etc (Note: The headband and boots I am using Silver Glitter Glue)
  •  I find it very helpful once I have applied my True Snow and Glitter Glues to use a hot hairdryer to dry these areas with so that I am not waiting for hours on end for drying ~ this way I can complete my project much quicker


  • Here is my finished project ~ my 3D mounted to my Card


I hope you have enjoyed my 3D Tutorial today.

As always, any comments are very much appreciated. 
Thank you for stopping by and have a wonderful day.


Annette ~ http://annetteshobbyrosettes.blogspot.com.au/


Hope you have a blessed day and thanks for stopping by.

Friday Cards ~ Revamping


Hello Friends !

Annette here for the Scrapbook Blessings Club to share with you Friday's project ~ "Cards".

My Tip Today: Make use of your old cards ~ bring them back to life again


Now to one of my favorite things I like to do. I make a large number of cards, as I do not sell my cards I like to make use of them where I can and if I can. I love making cards and entering them into challenges, its like playing a poker machine (lol) the excitement of watching and winning if you can be so lucky.
When I get a card that has taken the eye of DT members on several challenges and has won I know its a special card and thought rather than bin the cards I came up with the idea of revamping them and re-entering them into challenges and winning again with that old card.

Here is a card I made some months ago and it won a few challenges. After the date of make had flown by I just thought it was a pity to bin the card, so I studied the challenges that were open at that time and saw a challenge theme "In the Garden". I thought just "PERFECT".
So on went my thinking cap and I completely re-vamped my old Bendi Fold Card.


This is the original Bendi Fold Card I created and won challenges with:-

And here is how I revamped the original Bendi Card:-
Keeping the original trees, I added extra Fern, I changed the grassing using a die and having 3 various colours, added a tag "I Love my Garden" and popped a new Doily and Digital stamp. Here I had my new Bendi Fold Card all ready to go for a new challenge.......and, it won the challenge, 1st prize.
 Of course it did not finish there, I decided to utilize this Bendi Card one more time for one of my DT assignments, yes I revamped it again:-
Here is my current Bendi Fold Card re-vamped:-
This time I just used the very base card and totally re-vamped and changed the entire card.
I love re-vamping and I hope you have enjoyed my  tutorial on my revamping of the Bendi Fold Card.

As always, any comments are very much appreciated. 
Thank you for stopping by and have a wonderful day.


Annette ~ http://annetteshobbyrosettes.blogspot.com.au/


Hope you have a blessed day and thanks for stopping by.

Heart Box Easel Card

Heart Box Easel Card ~ Made this for Challenges

I recently discovered Gift Box Easel Cards.

I wanted to try something completely different to what other people had made so I thought up the idea of making Heart Box Easel Card. 

I have studied various techniques and styles of boxes but ended up working for two days on my own design as the heart box styles I downloaded off Google just did not suit my needs. I started off with my Cherry Lynn Hearts Dies utilizing various sizes ensuring I had a top and bottom heart, I then cut a strip and scored along the strip and cut out "V" sections to curve around the lower part of the heart. Once I had the bottom heart attached with the heart box wall I then went around the edge with the glue gun of the top heart and glued it to the box. 

I then attached Ribbon and printed paper with double sided adhesive around the box heart then rolled a heart cut shape over the box to give it extra lacy effect. I then stacked up my heart boxes and completed my Heart Box Easel Card.
The Easel itself is actually separate to the platform, this being to stabilize it with all of the weight of my heart box and Digital etc. I have layered extra Cardstock on the walls of the Easel to give it strength and support. The platform I have cut out a separate piece of cardstock and then attached the Easel with double sided adhesive to the platform then decorated my Easel.


Correction to this document ~ should read
"Fold your Easel into (Triangle) shape not (Diamond) shape"
Print this pattern off on an A4 Copier Paper and it will be actual size.
Recipe:
  • I have used Sherri Ann Baldy's My Besties Digi Stamp Image Number IMG238 ~ you can see this Digi HERE!
  • Copics: E000, E41, E00, E11, R20, R27, R14, E59, E15 & G82
  • Kaisercraft Cardstock
  • Bella Glitz Cardstock
  • Red and White Check Designer from old stash
  • White Gel Pen
  • Gold Corners covered with Gold Gel Pen
  • Gold Heart
  • 1/2" Red Satin Ribbon
  • 1" White Check Ribbon
  • Red and White Mulberry Paper Flowers
  • Die: Cherry Lynn Hearts ~ Various Sized Hearts
  • Heart Boxes hand made
  • Heart Embossing Folder


Entry No. 36 ~ Brown Sugar Challenge # 113 ~ "Anything Goes"
Finishes on: 2nd October, 2014
http://brownsugarchallenge.blogspot.com.au/2014/09/challenge-113-anything-goes.html 

Entry No. 45 ~ Fussy and Fancy ~ Main Colour Red
Finishes on: 3rd October 2014
http://fussyandfancychallenge.blogspot.ca/2014/09/fussy-and-fancy-challenge-123-main.html 

Entry No. ~ Simply Create Too # 71 ~ It's a Special Occasion 
Finishes on: 9th october 2014
http://simplycreatetoo.blogspot.com.au/2014/09/challenge-71-its-special-occasion.html

Entry No. 9 ~ Suzy Bees Bloomin Challenge # 48 ~ with a twist use some Red 
Finishes on: 4th October 2014
http://suzypantssmarty.blogspot.co.uk/2014/09/suzy-bees-bloomin-challenge-48-atg-with.html

Entry No. 17 ~ Deep Ocean Challenge #94 ~ Favourite 2014 Card
Ends: 16th January 2015
http://deepoceanchallengeblog.blogspot.com.au/2014/12/challenge-94-favourite-2014-card.html 
  

Friday 26 September 2014

Halloween Pink Card

"Halloween"

Sherri Ann Baldy's Digital 3D

Recipe:
  • Cardstock: Bella Glitz from Spotlight
  • Cardstock: Kaisercraft 
  • Star Die: Cherry Lynne
  • "October" Flair from Funky Flairs Studio "Months of the Year" Range
  • Digital 3D Image from Sherri Ann Baldy's My Besties
  • Banner from Spotlight
  • Cat from Google Halloween search
  • Halloween wording from "Bewitched" 12x12 
  • 31st ~ White Gel Pen
  • Pink Banner from "Bewitched" 12x12
  • Spider Red Pearl/Wobble Eyes Spotlight/Legs Spotlight
  • Stitching edging: Black and White Gel Pens from Office Works
Top 5 Winner
Entry No. 6 ~ Aud Sentiments Challenge Blog # 116
Finishes on: 7/10/14
http://audsentimentschallengeblog.blogspot.com.au/2014/09/challenge-116-halloween-sentiment.html 

Entry No. 7 - A Step In The Dark # 11
Finishes on: 7th October 2014
http://a-step-in-the-darkness.blogspot.co.uk/2014/09/challenge-11.html 

Entry No. 11 ~ Crafts Galore Encore Challenge ~ Halloween Anything goes in Diguise
Finishes on 31/10/14
http://cardsgalorechallenges.blogspot.co.uk/2014/10/trick-or-treat-something-scary-or.html 

Entry No. 12 ~ Come and Get It ~ "Halloween"
Finishes on 11/10/14
http://cagichallenge.blogspot.ca/2014/10/it-is-halloween-challenge.html 

Entry No. 4 ~ Cheery Lynn Designs ~ Halloween
Finishes on:
http://cheerylynndesigns.blogspot.com.au/2014/10/cheery-lynn-designs-challenge-153.html 


Thursday 25 September 2014

Folded Wedding Card ~ Funky Flairs DT Project

Folded Wedding Card 
 Funky Flairs Studio Wedding Flairs
Recipe:
  • Funky Flairs from Wedding Range from Funky Flairs Studio
  • 18mm White Roses with Frosted Pearl Glitter in centre 
  • Heart Die from Cherry Lynn Designs
  • White & Silver 1" Ribbon from Spotlight
  • White Veil Netting from Spotlight
  • Embossing Folder Hearts
  • Whimsy Digital Stamp
  • Copics: E000, E14, E00, R20, E59, E35, E15, C3
  • Veil: Pearl Glitter Glue and Wedding Dress combination of Pearl Glitter Glue and Silver Glitter Glue
  • Kaiser Cardstock


Wednesday 24 September 2014

KennyK Xmas Card

KennyK Digital
Xmas Card

Recipe:
  • KennyK Digital
  • Kaisercraft Cardstock
  • Tim Holtz Rosette Die
  • 1" Red buttons
  • 12mm White Plastic Buckles
  • 1" Green Star Ribbon Spotlight
  • 1" Red Ribbon with Gold Stripe Spotlight
  • Martha Stewart Punch Edger
  • 6mm Red Rhinstones
  • Bella Glitz Cardstock

60th Bookmark Birthday Card

60th Cheri Bookmark Birthday Card
Made this Card for my Best friend's 60th Birthday
 Recipe:
  • Cardstock Kaisercraft (Black/Light Grey/Red)
  • Calico Flower made by Funky Flairs
  • Aleene's True Snow "White" on Calicao Flower
  • Digital Stamp ~ Sassy Studio Designs
  • All Black Die Cuts ~ Cricut Cartridge "Summer in Paris" & "Accent Essentials" :- (Leaves ~ Cheri ~ Dressmaker Dummy ~ Perfume Bottle)
  • Red Striped 3/4" Ribbon (Spotlight)
  • Lace Off White imported from UK
  • Red Mulberry Flower
  • Small Black Pearls 3mm
  • 1 x 18mm Pearly/Rhinestone Embellishment
  • Embossing Folder Couture Creations ~ Cabaret
  • Inside Card: Printed Paper: Sugar & Spice Mono Positive/Negative 
  • Inside Card: Label ~ Die Sizzix Labels & Stitched Frames
  • Label made from Glossy Photo Paper
  • Stamp: Happy Birthday ~ Heidi Grace Rubber Stamps
 Entry No. 20 ~ A Gem of a Challenge # 128 ~ Milestone Birthday
Finishes on 25th September 2014
http://pinkgemchallengeblog.blogspot.com.au/2014/09/challenge-128-milestone-birthdays.html  

Entry No. 16 ~ Crafty Catz Weekly Challenge Birthday
Finishes on: 2nd October 2014
http://craftycatzweeklychallenge.blogspot.com.au/2014/09/happy-birthday-to-crafty-catz.html 

Entry No. 18 ~ Simply Create Too # 71 ~ Its A Special Occasion
Finishes on: 9th October 2014
http://simplycreatetoo.blogspot.com.au/2014/09/challenge-71-its-special-occasion.html 

1st Prize Winner (44 entries)
Entry No. 37 ~ Crafty Calender Challenge ~ Leaves and Lace
Finishes on 4th October 2014
http://craftycalendarchallenge.blogspot.com.au/2014/09/crafty-calendar-september-challenge.html 

Entry No. 10 ~ Artistic Inspirations ~ Some of our favourite things
Ends: 5th January 2015
 http://artisticinspirationschallenges.blogspot.com.au/2014/12/some-of-our-favourite-things.html
 

Tuesday 23 September 2014

Cheri Book Mark Card

Book Mark Card

Recipe:
  • Cardstock Kaisercraft (Black/Light Grey/Red)
  • Calico Flower made by Funky Flairs N Flowers
  • Aleene's True Snow "White" on Calicao Flower
  • Digital Stamp ~ Sassy Studio Designs
  • All Black Die Cuts ~ Cricut Cartridge "Summer in Paris" & "Accent Essentials" :- (Leaves ~ Cheri ~ Dressmaker Dummy ~ Perfume Bottle)
  • Red Striped 3/4" Ribbon (Spotlight)
  • Lace Off White imported from UK
  • Red Mulberry Flower
  • Small Black Pearls 3mm
  • 1 x 18mm Pearly/Rhinestone Embellishment
  • Embossing Folder Couture Creations ~ Cabaret
  • Inside Card: Printed Paper: Sugar & Spice Mono Positive/Negative 
  • Inside Card: Label ~ Die Sizzix Labels & Stitched Frames
  • Label made from Glossy Photo Paper
  • Stamp: Happy Birthday ~ Heidi Grace Rubber Stamps
Entry No. 4 ~ Dream Valley Challenges ~ Lace & Ribbon
Finishes on: 4th October 2014
http://dreamvalleychallenges.blogspot.ca/2014/09/challenge-91-lace-and-ribbon.html 

Entry No. 48 ~ Crafty Cardmakers and more # 123 - Ribbon/Lace & Pearls
Finishes on: 29th September 2014
http://craftycardmakers.blogspot.com.au/2014/09/123-ribbonslace-and-pearls.html 

Entry No. 16 ~ Deep Ocean Challenge #94 ~ Favourite 2014 Card
Ends: 16th January 2015
http://deepoceanchallengeblog.blogspot.com.au/2014/12/challenge-94-favourite-2014-card.html